A well-fitting motorcycle helmet is crucial for your safety on the road. It provides protection against head injuries in the event of an accident. To ensure optimal protection, it’s essential to have your helmet properly sized. Here’s a step-by-step guide on how to measure your head for a motorcycle helmet:
1. Gather the Necessary Tools:
- A soft measuring tape
2. Measure Your Head:
- Wrap the measuring tape around your head, starting at the widest part of your forehead, just above your eyebrows.
- Ensure the tape is level and doesn’t slip.
- Make sure to measure around the back of your head, including the widest part.
- Take note of the measurement in centimeters or inches.
3. Refer to Helmet Size Charts:
- Once you have your head measurement, consult a helmet size chart. These charts typically list helmet sizes based on head circumference.
- Find the size range that corresponds to your measurement.
4. Consider Helmet Shape:
- While head circumference is a crucial factor, helmet shape also plays a role in achieving a comfortable and secure fit. Some helmets are designed for oval-shaped heads, while others are better suited for round heads.
- If you have a specific head shape, consider looking for helmets designed to accommodate it.
5. Try on Helmets:
- Whenever possible, try on different helmets to find the best fit. A well-fitting helmet should feel snug but not overly tight. It should sit comfortably on your head without rocking or shifting.
- Make sure the helmet doesn’t press too hard on your temples or forehead.
6. Check for a Snug Fit:
- The helmet should sit securely on your head without feeling too loose. A properly fitting helmet will stay in place even during a sudden stop or impact.
- Check the cheek pads for a snug fit. They should be comfortable but not too tight.
Remember: A helmet that is too small can be uncomfortable and may not provide adequate protection. A helmet that is too large can shift during a crash, pote
Why Helmet Fit Matters
The fit of a motorcycle helmet can make the difference between life and death in the event of an accident. A helmet that’s too loose may fly off in a crash, while one that’s too tight can cause discomfort and distract you while riding. Having the perfect fit ensures maximum protection while providing the comfort you need for longer rides. But before you buy, knowing how to measure your head for a motorcycle helmet is the first critical step.
Tools You’ll Need for Measuring
To accurately measure your head, you don’t need any special tools—just a few household items:
-
A soft measuring tape: Flexible enough to wrap around your head.
-
A mirror or a friend: It’s easier to measure with someone’s assistance or while looking in a mirror.
-
Pen and paper: To jot down your measurements for reference.
Make sure to have these tools on hand before you start the measuring process.
Step-by-Step Guide to Measure Your Head for a Motorcycle Helmet
Follow these steps to get the most accurate measurement of your head:
1. Wrap the Measuring Tape Around Your Head
Stand in front of a mirror or have a friend help you. Place the measuring tape about an inch above your eyebrows, which is the widest part of your head. Ensure that the tape sits straight around the circumference of your head, including above your ears and around the largest part of your skull at the back.
2. Adjust for Accuracy
While wrapping the tape around your head, ensure that it remains snug but not too tight. The goal is to measure the actual size of your head, not a compressed version. Make sure the tape lies flat against your head with no slack.
3. Record Your Measurement
Once the measuring tape is positioned correctly, note the number where the tape meets. Write down your measurement in centimeters or inches, depending on the sizing chart you’ll be using later. Most helmet manufacturers provide size charts in both units.
4. Cross-Reference with a Helmet Sizing Chart
Each manufacturer might have slightly different helmet sizing, so consult the specific brand’s size chart when purchasing a helmet. Using your recorded measurement, find the corresponding helmet size. If your head measurement falls between two sizes, always go for the larger size or consider helmets with adjustable padding.
Different Head Shapes and Helmet Types
It’s not just size that matters when choosing a motorcycle helmet; your head shape plays a significant role in finding the perfect fit. Helmets are generally categorized by three head shapes:
1. Round Oval
This head shape is almost perfectly round when viewed from the top, with equal width and length dimensions. Riders with round heads should look for helmets specifically designed for this shape.
2. Intermediate Oval
The most common head shape, intermediate oval heads are slightly longer from front to back than from ear to ear. Most helmet manufacturers design their helmets for this shape.
3. Long Oval
If your head is significantly longer from front to back, you have a long oval head. Helmets for long oval heads are narrower and longer to provide the right fit and avoid pressure points.
Understanding your head shape is crucial to ensuring that your helmet fits comfortably. A properly fitted helmet will distribute pressure evenly, reducing discomfort during long rides.
Common Helmet Sizing Mistakes and How to Avoid Them
When shopping for a motorcycle helmet, many people make common mistakes that lead to an improper fit. Here’s how to avoid those pitfalls:
1. Relying on Hat Size
Many riders assume that their hat size will translate to their helmet size, but this can lead to errors. Motorcycle helmets fit differently from hats, so always measure your head and use the manufacturer’s size chart instead of guessing.
2. Not Considering Head Shape
As mentioned earlier, head shape is as important as head size. If your helmet feels uncomfortable or causes pressure points after wearing it for a while, it’s likely because you’ve chosen the wrong shape. Make sure to choose a helmet that matches your head shape, not just your head size.
3. Buying Without Trying On
It’s always best to try on a helmet before purchasing, especially if you’re shopping in-store. If you’re buying online, ensure the retailer has a good return policy. When you try on a helmet, it should fit snugly but not painfully tight, and there should be no gaps between the helmet padding and your head.
Testing Your Helmet Fit
Once you’ve received your new helmet, it’s time to test its fit before hitting the road. Here’s how to check if your helmet fits correctly:
1. The Shake Test
With the helmet on, try shaking your head from side to side and up and down. The helmet should stay securely in place without moving. If it shifts around, it’s too loose and won’t offer adequate protection.
2. The Pressure Test
Wear the helmet for about 15-30 minutes to assess its comfort. Pay attention to any areas where you feel excess pressure or discomfort. A properly fitted helmet will distribute pressure evenly around your head, so if there’s a hotspot, the helmet may not be the right shape for you.
3. Check for Vision Obstruction
Ensure that your helmet doesn’t obstruct your vision. The top of the helmet should sit just above your eyebrows, and you should have a clear field of view. If the helmet sits too low or too high, it may not offer proper protection.
Importance of Regular Helmet Replacement
A motorcycle helmet is not a lifetime investment. Over time, the materials in the helmet degrade, making it less effective at protecting you. Helmets should be replaced every 5-7 years, or immediately after a crash, even if there’s no visible damage.
Signs It’s Time for a New Helmet
-
Visible damage: Cracks, dents, or significant scratches on the helmet.
-
Worn-out padding: If the interior padding no longer provides a snug fit.
-
Age: If your helmet is older than five years, it’s time for a replacement.
Choosing the Right Helmet Type
Once you’ve measured your head and determined your size, it’s time to choose the right helmet style. Different helmets offer varying levels of protection and comfort based on your riding habits.
1. Full-Face Helmets
Full-face helmets provide the most comprehensive protection, covering your entire head and face. These are ideal for long-distance and high-speed riding, offering better protection from impact and debris.
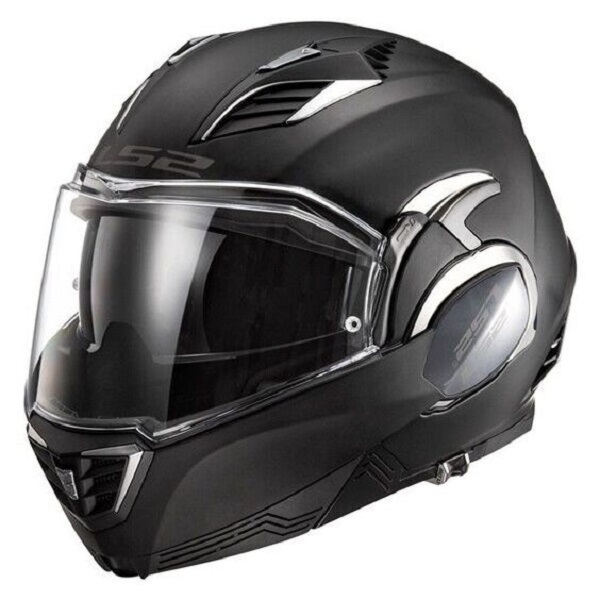
2. Modular Helmets
Modular helmets are a hybrid between full-face and open-face helmets. The front section can be flipped up, allowing for more versatility while maintaining a decent level of protection.
3. Open-Face Helmets
While open-face helmets provide less protection than full-face helmets, they offer a greater sense of freedom and improved visibility. These are popular for city commuting and low-speed riding.
4. Off-Road Helmets
Designed for dirt bike and adventure riding, off-road helmets typically feature a large visor and more ventilation. These are perfect for riders who need a lightweight helmet with maximum airflow.
Final Thoughts on Measuring Your Head for a Motorcycle Helmet
Understanding how to measure your head for a motorcycle helmet is a crucial step in ensuring your safety on the road. A helmet that fits well not only protects you during an accident but also provides comfort during long rides. Use the step-by-step guide provided, consider your head shape, and always cross-reference your measurements with the manufacturer’s size chart. Once you’ve found the right fit, don’t forget to check your helmet regularly for signs of wear and tear.