Regularly checking your motorcycle’s oil level is crucial for maintaining engine health and preventing costly repairs. While it may seem daunting for new riders, the process is straightforward once you understand the basics. This guide will walk you through the steps of checking your motorcycle oil, including when to check it, what to look for, and how to interpret the results.
Understanding the Importance of Motorcycle Oil
Motorcycle oil serves as the lifeblood of your engine, providing essential lubrication and protection. It helps reduce friction, prevents wear and tear, and dissipates heat. By maintaining optimal oil levels, you can extend your motorcycle’s lifespan and ensure peak performance.
When to Check Your Motorcycle Oil
Ideally, you should check your motorcycle’s oil level before every ride. However, this may not be practical for everyone. A good rule of thumb is to check it at least once a week or before embarking on a long journey. Additionally, it’s essential to check the oil level after a recent oil change or if you suspect a leak.
How to Check Motorcycle Oil: A Step-by-Step Guide
Step 1: Park on Level Ground
Ensure your motorcycle is parked on a stable and level surface. This will provide an accurate reading of the oil level.
Step 2: Allow the Engine to Cool
Before checking the oil, let the engine cool down for a few minutes. Hot oil expands, which can give you an inaccurate reading.
Step 3: Locate the Dipstick or Inspection Window
Most motorcycles have either a dipstick or an inspection window to check the oil level. Consult your owner’s manual to determine the method used on your specific bike.
Step 4: Check the Oil Level Using the Dipstick
If your motorcycle has a dipstick, follow these steps:
- Remove the dipstick: Carefully remove the dipstick from the engine.
- Wipe the dipstick: Use a clean cloth to wipe the dipstick clean of old oil.
- Reinsert the dipstick: Fully insert the dipstick back into the engine.
- Check the oil level: Remove the dipstick again and examine the oil level. There will be two marks on the dipstick: “Add” and “Full.” The oil level should be between these two marks.
Step 5: Check the Oil Level Using the Inspection Window
If your motorcycle has an inspection window, follow these steps:
- Locate the inspection window: The window is typically located on the engine case.
- Check the oil level: Look through the window and observe the oil level. There will be markings on the window indicating the “Add” and “Full” levels. The oil level should be between these marks.
Interpreting the Oil Level
- Oil level too low: If the oil level is below the “Add” mark, add the recommended type and amount of oil to your motorcycle.
- Oil level too high: If the oil level is above the “Full” mark, remove excess oil. Overfilling can cause engine problems.
- Oil condition: While checking the oil level, also inspect the oil’s condition. It should be clear or slightly amber in color. If the oil is dark, thick, or contains metal particles, it may be time for an oil change.
Additional Tips for Checking Motorcycle Oil
- Regular oil changes: Follow your motorcycle’s recommended oil change intervals.
- Use the correct oil: Always use the type and viscosity of oil specified in your owner’s manual.
- Check for leaks: Regularly inspect your motorcycle for oil leaks.
- Carry a spare oil bottle: It’s a good idea to carry a small bottle of motorcycle oil with you on long rides.
The Importance of Choosing the Right Motorcycle Oil
Selecting the correct motorcycle oil is crucial for engine health and performance. Different types of motorcycles have specific oil requirements based on engine design, riding conditions, and manufacturer recommendations. Let’s dive into the world of motorcycle oils.
Types of Motorcycle Oil
1. Mineral Oil:
- Derived directly from crude oil
- More affordable than synthetic oil
- Offers basic engine protection
- Suitable for older motorcycles or those with lower performance demands
2. Synthetic Oil:
- Engineered in a laboratory using advanced chemical processes
- Superior performance compared to mineral oil
- Better at resisting heat, oxidation, and viscosity breakdown
- Ideal for high-performance motorcycles, sport bikes, and those subjected to extreme riding conditions
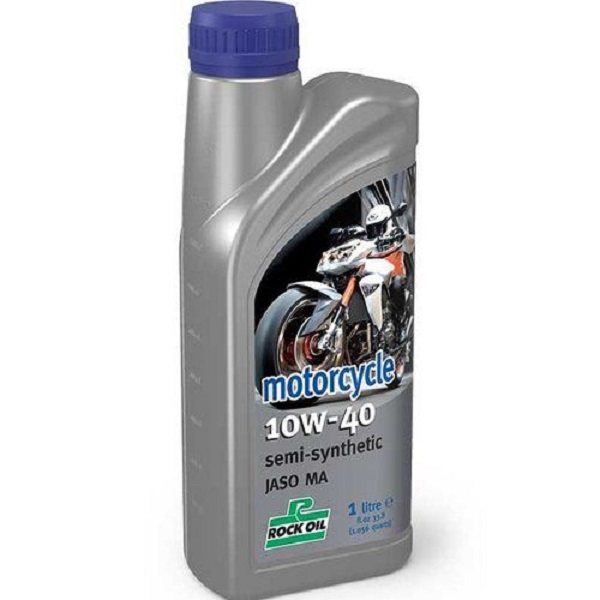
3. Semi-Synthetic Oil:
- A blend of mineral and synthetic oils
- Offers a balance of performance and affordability
- Suitable for a wide range of motorcycles
Oil Viscosity: What Does It Mean?
Oil viscosity refers to its thickness. It’s represented by a number followed by a W (winter) and another number. For example, 10W-40.
- The first number (10W) indicates the oil’s viscosity at cold temperatures.
- The second number (40) represents the oil’s viscosity at operating temperature.
The appropriate viscosity depends on your motorcycle’s engine, climate, and riding conditions. Consult your owner’s manual for the recommended viscosity.
Oil Certifications and Standards
Various organizations certify motorcycle oils to ensure they meet specific quality and performance standards. Some common certifications include:
- API (American Petroleum Institute): Sets standards for engine oil performance.
- JASO (Japanese Automotive Standards Organization): Focuses on motorcycle-specific oil requirements, including clutch performance.
- OEM (Original Equipment Manufacturer) Specifications: Specific requirements set by motorcycle manufacturers.
How to Choose the Right Motorcycle Oil
- Consult Your Owner’s Manual: This is the most reliable source of information for your motorcycle’s oil requirements.
- Consider Your Riding Conditions: If you ride in extreme conditions (hot or cold temperatures), consider a synthetic oil with a wider viscosity range.
- Check for Oil Leaks: If you experience frequent oil leaks, using a thicker oil might help. However, consult a mechanic to diagnose the root cause of the leak.
- Balance Performance and Cost: Synthetic oils offer superior performance but come at a higher price. Mineral oil is more affordable but may not provide the same level of protection.
How to Change Your Motorcycle Oil: A Step-by-Step Guide
Regularly changing your motorcycle’s oil is crucial for maintaining engine health and performance. While it might seem intimidating, with the right tools and knowledge, it’s a task that most riders can handle.
Gather Your Supplies
Before you begin, ensure you have the following:
- New motorcycle oil: Refer to your owner’s manual for the correct type and quantity.
- New oil filter: Check your owner’s manual for the correct filter.
- Oil filter wrench: This tool is often necessary to remove the oil filter.
- Drain pan: To catch the old oil.
- Socket wrench and appropriate socket: For removing the drain plug.
- New drain plug washer (if required): Check your owner’s manual.
- Funnel: For pouring new oil.
- Rag or shop towels: For cleaning up spills.
- Gloves: To protect your hands from dirty oil.
Preparation
- Find a suitable workspace: A garage or driveway is ideal.
- Park your motorcycle on a level surface: This ensures accurate oil level readings.
- Allow the engine to cool: To prevent burns and to allow the oil to drain more completely.
Draining the Old Oil
- Loosen the drain plug: Use your socket wrench to loosen the drain plug, but don’t remove it completely yet.
- Position the drain pan: Place the drain pan under the drain plug.
- Remove the drain plug: Carefully remove the drain plug and let the oil drain completely.
- Replace the drain plug washer (if necessary): Install a new drain plug washer according to your owner’s manual.
- Reinstall the drain plug: Tighten the drain plug securely, but avoid overtightening.
Replacing the Oil Filter
- Remove the old oil filter: Use the oil filter wrench to loosen and remove the old filter.
- Clean the filter mounting surface: Wipe the filter mounting surface clean with a rag.
- Lubricate the new oil filter gasket: Apply a thin coat of new oil to the gasket of the new oil filter.
- Install the new oil filter: Hand-tighten the new oil filter until the gasket makes contact, then give it an additional 3/4 to 1 turn with the oil filter wrench. Avoid overtightening.
Adding New Oil
- Fill with new oil: Use a funnel to slowly add the recommended amount of new oil to the engine.
- Check the oil level: Use the dipstick to check the oil level. Add more oil if necessary, but avoid overfilling.
Starting the Engine
- Start the engine: Let the engine run for a few minutes to circulate the oil.
- Check for leaks: Inspect the engine for any oil leaks.
- Re-check oil level: After the engine cools, check the oil level again and add oil if needed.
Disposal of Used Oil
- Recycle your used oil: Many auto parts stores and recycling centers accept used oil.
- Properly dispose of the oil filter: Some auto parts stores will recycle oil filters.
Note: Always consult your motorcycle’s owner’s manual for specific instructions and torque specifications. If you’re unsure about any step, it’s best to seek assistance from a qualified mechanic.
Conclusion
Checking your motorcycle oil is a simple but essential maintenance task. By following these steps and paying attention to the oil level and condition, you can help ensure the longevity and performance of your bike.
Remember: Always consult your motorcycle’s owner’s manual for specific instructions and recommendations.